Materials
Zen Garden #09 and #10
Tuesday, November 2nd, 2010
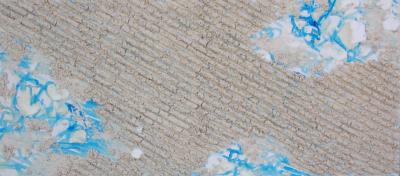
Zen Garden 09 work in progress, 48 x 21 x 2 inches mixed media on canvas
The perfect painting in a room can elevate the atmosphere of the whole floor, and sets the tone for showing off the entire house. With selling the house in mind, I’m trying to choose a decent painting for our living room, because Zen Garden 02 sold, so I decided it’s worthwhile to make two more for the series.
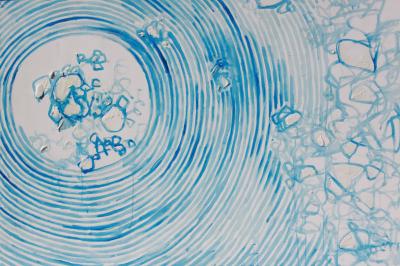
Zen Garden 10 outline, 40 x 60 x 3 inches Mixed Media on canvas
Painting is always meditative, but I find it especially so when creating pieces in the Zen Garden series. This kind of work does not present the same kind of emotional concentration or intellectual challenges that other paintings do. There are few struggles and hardly any decisions to make, except to find cooperative materials. Once the outline is accomplished it’s pretty straightforward compared to other forms of painting. The outstanding difference is that each stage in these 3D paintings requires time and patience to allow areas to dry before proceeding. The Zen Gardens can be drying in stages while other work gets done too, and the multi-tasker in me is quite happy to be accomplishing many things at once!
 Art supplies are expensive. Most will last long enough to justify purchases, and much of the time you get what you pay for, but some items are ridiculously overpriced. Keeping material costs down is essential so they aren’t reflected in the final price, but quality should never be compromised. Still, there are ways to get around any dilemma, and there are alternatives for everything.
When I started the Zen Garden series ten years ago using modeling paste and textured gels, jars were about $15 for 250 ml. Since then I’ve experimented with various unusual materials, and shopped everywhere to compare prices. It’s still more economical to purchase brand-name products in larger quantities – if you can find them. There are some fun mediums available now too, like gel with tiny glass beads in it. Prices for art supplies do not seem to waver over time in either Canada or the U.S., so I reserve the brand-name mediums to sculpt the rocks and highest quality paints do the finishing touches. Here I’ll share a few of the trade secrets I’ve discovered over the years, and you can create your own Zen garden painting.
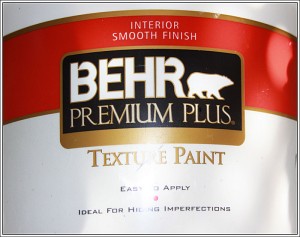 As a base for the raked sand mixture, it’s worth purchasing a large 2 gallon (7.58 L) pail of textured paint. I purchased Behrs at Home Depot in Canada, and it looks like Ralph Loren has the market cornered in the States. Watered-down drywall plaster can be used also, but I recommend attention to how heavy the piece may be when it’s finished. Mix in copious quantities of white glue, large containers of white or light-colored acrylic craft paints, and anything water-based that will extend the liquid mixture and bind well with the dry ingredients. Sand, even popcorn kernals and/or rice can be added for texture. Other objects can be incorporated too…just use your imagination. For example, and this is my most valuable secret, unscented kitty litter from the dollar store, the non-absorbant kind, looks exactly like tiny stones and is light in weight.
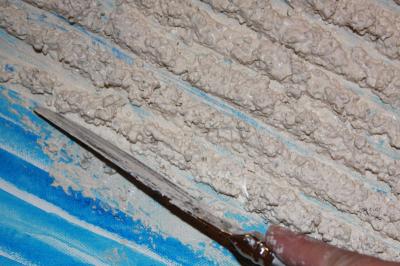
Zen Garden 09 details: applying mixture with a knife, sculpting rows
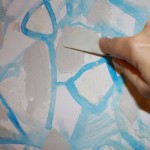 The mixture can be put in a ziplock bag with one corner cut out, but I discovered that it’s more efficient – however messy – to spread small portions out onto the surface with a knife and hand-mold it. Keep a wet cloth handy to wipe your hands and the utensil often.
Drywall plaster makes nice-looking rocks, plus it cracks well for a parched-earth look, use sparingly because of added weight. Wood filler is a lighter alternative, much less expensive than professional brand gels and mediums. Modeling pastes do not lend well to sanding or carving when dry, but wood filler can be sanded and re-shaped. 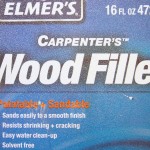 Also, if it dries out completely, chop it up, add water then seal the container for a day or so. This is where you can experiment with whatever helps acheive 3D effects. Art, craft, hardware, department stores and dollar stores carry generic brand basics, so it’s worth researching and shopping around.
When it’s all dry, rocks and other details are outlined and painted with pure colors, then all covered with a coat of primer. The colors are all reapplied to further enhance rocks, then brushed white, skimming across the entire surface. This process is repeated until you are pleased with the results by a final coat of white with remnants of the layers of colors poking through underneath. As far as acrylic paints, you do get what you pay for, but price differences are mostly due to pigment quality and viscosity, which, until final stages is not really an issue. Inexpensive acrylic craft paints are perfect as a filler (only).
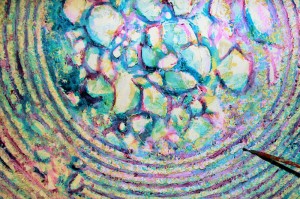 Zen Garden #10, above and left is already quite heavy, so about 1/4 of it will be painted rocks, keeping the sand patterns to a minimum. There is enough mixture that could dry out if it’s not used right away, plus it’s great to make multiples while all the mess, materials and utensils and are out, so I’m doing two simultaneously. There may even be enough for 3!
The necessity of work, especially if it’s at home, seems less like a chore if you dangle some kind of carrot for yourself every day. Sometimes having too much to do is more exhilarating than exhausting. Each day, though work as an artist can be considered by others as play, the energy, motivation and circumstances are unpredictable.. It takes self-discipline to find a way to go with the flow and still get work done. The good thing about this occupation is that it is flexible in every way. The creative compulsion seeps into every other activity, and there is almost no way to not add a little something extra.
Behind The Scenes
Friday, December 5th, 2008
The brush swishing against the taut canvas makes a music of its own.. gentle drumming sounds. Priming the canvas is a soothing task. It’s purely a sight thing, straightforward, doesn’t need study or thought. There are so many small efforts toward the creation of a painting. The process of defining a scene on the front is probably 40% of the entire amount of work considered.
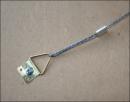
We’re result-oriented, but details matter: the materials underneath the paint, the quality of paint, to frame or not to frame, tidiness, cleanliness back and front, hanging apparatus…these are just a few of the details behind my scenes.


